Dockerize Your Project, Part 3. Continuous Rails builds
In Part 1 we've set up Jenkins and a private Docker Registry and exposed them using Nginx.
In Part 2 we've created a build configuration and dockerized the Rails application manually.
In this final Part 3 we will configure Jenkins for automated application builds and dockerization.
In order to do this we need slighly more tools than the official Jenkins image provides. These tools are:
- ruby
- bundler
- database client
- js runtime
- docker
So first of all we need an image with everything above on top of the Jenkins official image. Let's create it.
Building Jenkins image with Ruby inside
Create a new project directory and cd into it:
$ mkdir myproject-jenkins
$ cd myproject-jenkins
Create a Dockerfile with the following content:
FROM jenkins:1.642.2

USER root
RUN apt-get -qy update
RUN apt-get -qy install dpkg-dev debian-keyring

# ruby2.3 package dependencies
RUN apt-get -qy install dpkg-dev autotools-dev bison chrpath debhelper dh-autoreconf file libffi-dev libgdbm-dev libgmp-dev libncurses5-dev libncursesw5-dev libreadline6-dev libssl-dev libyaml-dev ruby ruby-interpreter  rubygems-integration systemtap-sdt-dev tcl8.5-dev tk8.5-dev

# db libs/js runtime
RUN apt-get -qy install libpq-dev libsqlite3-dev nodejs

# docker
RUN apt-get -qy install apt-transport-https ca-certificates
RUN apt-key adv --keyserver hkp://p80.pool.sks-keyservers.net:80 --recv-keys 58118E89F3A912897C070ADBF76221572C52609D
RUN touch /etc/apt/sources.list.d/docker.list
RUN echo "deb https://apt.dockerproject.org/repo debian-jessie main" > /etc/apt/sources.list.d/docker.list
RUN apt-get -qy update
RUN apt-get -qy install docker-engine
RUN gpasswd -a jenkins docker

ADD build /var/jenkins_home/build
RUN /var/jenkins_home/build/ruby-install.sh
RUN /var/jenkins_home/build/gems-install.sh
RUN /var/jenkins_home/build/change-permissions.sh
RUN rm -Rf /var/jenkins_home/build

USER jenkins
ENTRYPOINT ["/bin/tini", "--", "/usr/local/bin/jenkins.sh"]
Packages installation is pretty straightforward, the tricky part starts from the docker setup. The RUN steps are just copied from the official page for Debian Jessie. But, as you can see, we don't run it as a daemon anywhere. The good explanation why you don't want to run docker inside another docker(dind) container, especially for CI, you can find in this post by Jérôme Petazzoni: Using Docker-in-Docker for your CI or testing environment? Think twice. Instead, we would share docker.sock and bin/docker between the host and jenkins container.
After setting up docker, I execute 3 simple scripts:
build/ruby-install.shbuild/gems-install.shbuild/change-permissions.sh
Here is their content:
$ cat build/ruby-install.sh
#!/bin/bash

cd /tmp
wget -O ruby-install-0.6.0.tar.gz https://github.com/postmodern/ruby-install/archive/v0.6.0.tar.gz
tar xvzf ruby-install-0.6.0.tar.gz
cd ruby-install-0.6.0
make install
ruby-install ruby 2.3.0

ln -nfs /opt/rubies/ruby-2.3.0/bin/ruby /usr/bin/ruby
ln -nfs /opt/rubies/ruby-2.3.0/bin/gem /usr/bin/gem
$ cat build/gems-install.sh
#!/bin/bash

gem install rake bundler --no-rdoc --no-ri

ln -nfs /opt/rubies/ruby-2.3.0/bin/bundle /usr/bin/bundle
ln -nfs /opt/rubies/ruby-2.3.0/bin/bundler /usr/bin/bundler
$ cat build/change-permissions.sh
#!/bin/bash

chown jenkins:jenkins /opt/rubies -R
ruby-install.shinstalls ruby2.3 with a help of ruby-install toolgems-install.shinstalls bundlerchange-permissions.shsets jenkins user as the owner of the/opt/rubies(since this user executes the builds)
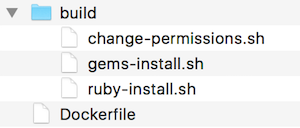
Final structure of the myproject-jenkins:
Now we can build this image and push it to the registry:
$ docker build -t myproject/myproject-jenkins .
$ docker tag myproject/myproject-jenkins registry.myproject.com/myproject/myproject-jenkins
$ docker push registry.myproject.com/myproject/myproject-jenkins
Launch new Jenkins
Replace standard Jenkins in your myproject-services project, that we created in Part 1. The Rails application also uses PostgreSQL, so we need it as well to run specs. Eventually docker-compose.yml file should look like this:
nginx:
  image: "nginx:1.9"
  ports:
    - 80:80
    - 443:443
  links:
    - registry:registry
    - jenkins:jenkins
  volumes:
    - ./data_nginx/:/etc/nginx/conf.d:ro
registry:
  image: registry:2
  environment:
    REGISTRY_STORAGE_FILESYSTEM_ROOTDIRECTORY: /registry_data
  volumes:
    - ./data_registry:/registry_data
jenkins:
  image: registry.myproject.com/myproject/myproject-jenkins:latest
  ports:
    - 50000:50000
  links:
    - postgresql:postgresql
  volumes:
    - /var/run/docker.sock:/var/run/docker.sock
    - /usr/bin/docker:/bin/docker
    - ./data_jenkins:/var/jenkins_home
postgresql:
  image: postgres:9.5
  environment:
    POSTGRES_USER: "pguser"
    POSTGRES_PASSWORD: "pgpass"
    POSTGRES_DB: "myproject_test"
  ports:
    - 5432:5432
Run docker-compose up -d to start this stack.
Jenkins plugins setup
I usually use 2 plugins with Jenkins:
- Git Plugin to fetch git repositories
- EnvInject Plugin to use custom environment variables in build instructions
You can either download them manually and put into data_jenkins/plugins folder(don't forget about dependencies) or install it from Jenkins web-interface: https://ci.myproject.com/pluginManager/available
We would have 2 builds for the app:
- First ensures that the specs are green and the production requirements are met
- Second creates an image ready for production and puts it into the registry
Application build
Add a new build, I call it myproject-app1.
- Check Prepare an environment to run → Keep Jenkins Environment Variables and Keep Jenkins Build Variables
- In Source Code Management check Git, add your repository url and credentials(you can generate ssh-key using
ssh-keygen -t rsa -C "jenkins"and put it indata_jenkins/.sshfolder) - In Build Triggers check Poll SCM, every 5 minutes:
H/5 * * * * - In Build Environment section check Inject environment variables to the build process and in Properties Content put
DATABASE_URL=postgresql://pguser:pgpass@postgresql/myproject_test - In Build section add Execute Shell with a following content:
bundle install --binstubs
bin/rake spec
- And when a build is successful we want to create an image with it, so in Post-build Actions add Build other projects → dockerize myproject-app1 (check Trigger only if build is stable)
Docker image build
Add downstream build for myproject-app1, I named it dockerize myproject-app1.
- Check Prepare an environment to run → Keep Jenkins Environment Variables and Keep Jenkins Build Variables. In Properties Content put:
APP_NAME=myproject-apps/myproject-app1
APP_BUILD_CONFIG_DIR=myproject-app1
APP_BRANCH=master
- In Source Code Management select Git, and add a path to the repository with a build configuration we created in Part 2 and credentials
- In Build section add Execute Shell with a following content:
cd $APP_BUILD_CONFIG_DIR
rm -rf app
git clone git@gitlab.myproject.com:$APP_NAME.git -b $APP_BRANCH --single-branch app

cd app
APP_REVISION=$(git rev-parse HEAD)

cd ..

docker build -t $APP_NAME:$APP_REVISION .
docker tag $APP_NAME:$APP_REVISION $APP_NAME:latest
docker tag $APP_NAME:$APP_REVISION registry.myproject.com/$APP_NAME
docker tag $APP_NAME:$APP_REVISION registry.myproject.com/$APP_NAME:$APP_REVISION
docker push registry.myproject.com/$APP_NAME
docker push registry.myproject.com/$APP_NAME:$APP_REVISION
docker rmi registry.myproject.com/$APP_NAME:$APP_REVISION
One more step
Since our private registry is protected with HTTP Basic Auth, we need to log Jenkins in. To do this, enter the container with
$ docker ps
$ docker exec -it *container_id* bash
And inside the container, type
$ docker login -e "jenkins@myproject.com" -u "username" -p "password" registry.myproject.com
It will create config.json file in data_jenkins/.docker/ directory with authentication details.
That's it. Now you can leave the container and start the first build! Enjoy your dockerized project 😎